We will go through in the most simple way possible in this article how to use Webpack in HTML/CSS code development, with the example of the starter kit we use at Outsourcify that contains a Webpack 4 configuration.
Why should we use a task runner?
It’s been a while now that front-end web development – coding that usually involves only HTML, CSS and Javascript – implies using task runners based on the command line tools, usually with the help of NPM the NodeJS package manager. It doesn’t mean that NodeJS is involved at all in the project but it needs to be installed in order to run locally some Javascript development tools.
These tools are needed for a few essential front-end tasks :
- pre-proccessing SCSS into CSS
- bundling into a single file all the Jaavscript
- minifying both CSS and JS
- image optimization
- in our case our build also generates some HTML pages with the use of templating, a Webpack plugin will assembele together templates, usually header and footer templates can then be reused on all page.
The goal is globally from various SCSS, JS and HTML files to generate an optimized static website that’s ready to publish online. Of course all of this can still be done differently, some tasks can be handled with specific softwares (like Koala) or IDE (Visual Studio can handle it), but you’ll never get the flexibility of a command line tool.
Why does Webpack does it better?
Nowadays when developing front-end it’s mostly Webpack that is used, but other alternatives are always possible, Grunt and Gulp for example. We used Gulp for a while, along with Bower which was commonly used to bundle jQuery libraries a few years ago until the Bower team stopped maintaining it and recommended to switch to Webpack (which we did around that time as it seemed obvious if even the Bower guys were telling you to do so). We also used Browserify which would allow us to get the result in real time in a browser when coding, saving a file would reload the browser immediately. All of this is handled by Webpack plugins now.
Webpack handles natively a lot of the tasks, it also has a whole ecosystem of open source plugins that can do pretty much anything you want, examples of what it allows are:
- different configs for development/production, minification is not need in dev mode for example
- hot module replacement : no more reloading, saving a file automatically renders the compilation and reload the browser
- modern JS : transpile ES2015+ Javascript so it can still run on older browsers
The original purpose of Webpack is to bundle Javascript, which means uniting all the javascript code of a project and its dependencies into a single Javascript file that can be referenced from the HTML. It’s nearly mandatory when developing with React.JS or Vue.JS for example. This article deals with the use of Webpack not only to group your front-end Javascript, but also the CSS and HTML.
A strater kit to bootstrap HTML projects
Our objective here would be to create HTML pages for a website, let’s say we received a Adobe XD file which holds the design for several web pages, they all share the same header and footer.
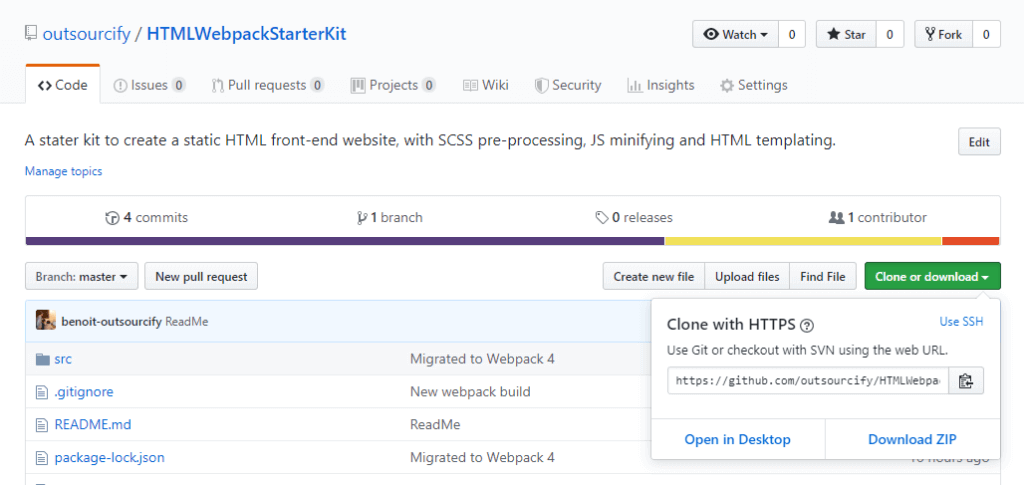
Creating the Webpack configuration can be a bit tedious, especially for smaller projects where you dont have time to start from scratch, that’s why we have this starter kit to kickstart quickly a very simple design to HTML project. You can find the starter kit on our Github account:
https://github.com/outsourcify/HTMLWebpackStarterKit
It holds these files :
├── src
│   │   contact.html
│   │   index.html
│   ├───fonts
│   │       font
│   ├───images
│   │   │   logo.png
│   │   ├───general
│   │   │       vertical-horizontal.png
│   │   └───icons
│   │           star.png
│   ├───js
│   │       index.js
│   ├───scss
│   │   │   main.scss
│   │   │   postcss.config.js
│   │   ├───components
│   │   │       _button.scss
│   │   │       _form.scss
│   │   │       _icon.scss
│   │   │       _normalize.scss
│   │   │       _typography.scss
│   │   │       _variables.scss
│   │   └───pages
│   │           base.scss
│   ├───blocks
│   │        footer.html
│   │        header.html
│   └───pages
│            index.html
│            about.html
│            contact.html
├── .gitignore
├── package-lock.json
├── package.json
├── README.md
└── webpack.config.js
It’s just something to start from and can be adapted easily. Here we have 2 HTML files (index.html and contact.html), which should use the same footer.html and header.html. The SCSS here is purely custom but it could be based on a framework like Bootstrap, the Javascript is in the index.js. We’ll get to those later.
First you will need to have Git and NPM installed on your computer. NPM is installed with with Node.js, it is the Node Package Manager which allows you to download Javascript libraries needed in the project (Webpack is a Javascript library as well as all its plugins). Everything in NPM is open source of course.
- Cloning the repository
With Git installed, you can usually with a right click open the “Git Bash” command line software in an folder, then you just need to launch this command to download the repository :
git clone https://github.com/outsourcify/HTMLWebpackStarterKit.git .
The url is found by clicking on Github’s “Clone or download” green button. You can either leave the dot in the command line, or git will create a folder named “HTMLWebpackStarterKit”.
- Installing the packages
The first thing to do is to install all dependencies. This is done with a simple command line.
npm install
What it does it checking the packages.json file for dependencies and devDependencies and install it in a “node_nodules” folder. The “devDependencies” are libraries that are not used in your project but libraries that are used to generate the project’s code during development : webpack but also babel, a Javascript compiler, Terser which minifies Javascript (it replaced UglifyJS), different CSS tools (SASS, autoprefixer), there is also webpack-dev-server, a development server that provides live reloading of the browser.
The “package-lock.json” file tells NPM which exact versions of each library we want to install as the “package.json” file itself just gives the minimum required version. This starter kit was just updated with the latest versions of Webpack and its plugins, it works well as it is now, the “package-lock.json” makes sure you get versions that work well together. All the 20 different libraries used are managed by different teams that constantly improve them but they might bring incompatibilities so they should be upgraded with care.
Run your first tasks
You’re now ready to run a few tasks included in the package.json file :
"start": "webpack-dev-server --mode development --open",
"build": "webpack --mode development",
"dist": "webpack --mode production",
"watch": "webpack --watch --mode development"
To run the development build task, just launch :
npm run build
This will create a “build” folder with your generate HTML, CSS and JS as well as images. The dist task will do the same but will create production ready files that are minified.
npm run start
This command will open a browser with the index.html page and everytime you save a SCSS or JS file it will reload the browser automatically.
Understand the Webpack config
Logically, the “webpack.config.js” holds the instructions to tell Webpack which tasks we want it to execute.
Basically it tells which libraries to use, and what to do with them, where are the source files (here the “entry” files are all in the “src/” folder) and where to output the generated files (here in “build/”). It also tells for each file type which “loader” should be used, JS is transpiled and compiled, SCSS is prec-processed, images are compressed etc, each by the appropriate plugin.
Check the code in this file, its pretty much self explanatory, the purpose of this article is not to explain how to configure Webpack but how to start quickly with our starter kit.
Add some Javascript libraries
Now it’s time to code your HTML, add sections to your pages. The important part is here to follow the folder structure in the “src/” folder, the different HTML files you wish to generate should be in the “src/pages” folder, any new HTML page created will have to be added here.
Then in order to add a block into your page, use this syntax:
<%= require('html-loader!../blocks/header.html') %>This build includes the HTML beautify plugin to make your code look pretty.
Instead we could also use a Javascript templating engine such as Pug, but this simple syntax works fine if you prefer to write HTML directly.
A starter kit to generate multiple HTML pages
You now have a starter kit which creates SEO friendly HTML pages, with a single minified CSS and JS file added to each. Of course we’re far from addressing the whole scope of what NPM and Webpack provides in this article. We will describe in the next articles how to import a CSS framework like Bootstrap and a Javascript libray, for example a slider plugin easily.